Monday, September 1, 2014

2-4-1 Part 2


Serendipity Quilt
 
 
Fig 1
Sew your strips into 4 sets ( cut your full width strips in half)  with all the strips lined up the same.  Separate into 2 sets (Fig 1) - one a mirror image of the other.  Press one set with all seams toward the #2 strips and the other sets toward the #7 strips.
Fig 2  
 
 
                                                                   Fig
 
Now you will separate the strips into 2 piles.  One pile will have the seams pressed toward the top and the second will have them pressed toward the bottom.  Fig 3 The easiest way to do this is to pick up the stack of 4 strips - lay the first 2 to the right and the next 2 to the left.
Now you will start building your first blocks.  Get out that seam ripper!
Fig 4
Fig 5


You will start with a full strip - placed in the center.  The next strips 2 & 3 you will remove the first square.  Set the removed  squares off to the side you will use them later.  When you are picking up your strips to add to each side alternate between the 2 piles you made when you were separating them (Fig 3).  I flip up a strip on the pile that I will be using next.  You do this so that you have opposing seams.  Continue in this manner, removing one more square each time, until you have only one square on each end.
 
Sew your  ½ block - starting with the single square on the far left and then add a strip until have added all of the strips and you have a triangle.  This is the first half of block 1.
 
Take the squares that you removed from the strips in block one and arrange them in the same manner.  Your ½ block will not be as large as the first by one row.  This will be the second half of block 2!
 
Flip your stacks of strips over and start building the next parts of your blocks.  This time you will start with the opposite end of the strips - strip #8.  Continue until you have the opposite sides of the blocks.    You will have extra strips that you may need to use in order to get your last 2 single squares. 
 
Sew the 2 halves down the center and you have completed 2 approximately 18” blocks from you strips sets.


2-4-1 Quilt Instructions


Monday, March 24, 2014

March Finish!


I finished this quilt a couple of weeks ago.
 I started it back in 2008 as a friendship  project with my Tuesday morning group.   I cut the 4-patch posey blocks from a very bright large floral fabric.  I gave each person sets for  4 small patches and 1 large patch.  They could arrange them anyway they liked.  There was almost every color in the flowers but since blue is my favorite that is what I asked them  to use to complete the 4-patch posies block!
 I set the blocks on point by adding triangles in natural tones.   The sashing is a coordinating  print that went with the large florals. There are tiny 4-patch posey blocks as the corner stones.
 Overall I like to look of the quilt.   It only took 6 years to complete!   Not too bad for me!


What do you think?  It is bright and on my bed right now!  It makes waiting for spring to really get here a little easier!
 

Tuesday, March 11, 2014

The Polar Vortex

The polar vortex is over!   Or so we hope!   It has been the second worst winter in Michigan's recorded history.   I can truly say that I did not enjoy being part of history!   But I do believe that spring is on its way!

During our mini ice age I did start and finish a real scrappy quilt. I used only fabric from my stash and scrap box!

I didn't really have a pattern.  I had seen this block demonstrated at an expo for the purpose of selling the templates.  I made one block using the sizes that were recommended (by using the templates), but it just seemed too fussy and wasteful.   Not that I am that frugal but it had to be done quicker.  I had a huge stash of  2.5" squares ready to go!   So that is where I started, making my wedges!

The top block is made using the intended shaped pieces.   The bottom block is made using 2.5" squares and then trimmed to the correct size wedge.   It was much quicker and really not that much waste.   I did use the original block in the quilt.  It is not that easy to spot.  Can you find it?


Well that is it for this time.  I will be posting again real soon with the UFO that is almost done!


Sunday, February 2, 2014

Latest UFO

 
I finished this about 5 years ago at a retreat.  I had been working on  it for a long time.  The petals are all hand appliqued.  I am not sure why I hadn't had it quilted.  I guess maybe I hoped I would become skilled enough at long arm quilting to do it exactly as I wanted.  Well, at that time I didn't even have a long arm!  To this day I have not become that skilled!  I had a certain way I wanted everything to be done, cross hatching behind the flowers, a vein in the petals and some type of feather in the sashing.   I finally decided to send it to a professional.  That would be Brenda Stump, Carleton, Michigan.  She did an amazing job.  Everything just as I wanted!


Now let us step back to that retreat about 5 years ago.  My friend, Barb Donathan, was inspired by mine to make one for her niece's wedding.  Isn't the black and white dazzling?  Same pattern but oh so different!  Way to go, Barb!  Notice the cute bag she also made.
 
Now to my  "woe is me" moment.  My long arm froze up on me today!  The polar vortex must have attached itself to my Bailey.  She will go to the doctor tomorrow!  In the mean time I guess I need to send some more of these 24 plus tops out to be quilted.  My goal this year is to reduce this stack - I didn't really set the goal that I had to be the one to do them!!!!!  My biggest problem is that I LOVE to piece the blocks.  Not that fond of putting the whole thing together but the block by block process is my favorite!
 
 
PS.  I got the pattern from a friend Nancy Noll but if you are interested in the pattern you can call or write this lovely lady, Evelyn McCarty.  She is 84 years young and such a sweet person.  She will personally mail it to you for $8.00 (which barely covers the cost).
 
 
Shadowed Daisy Pattern
Evelyn McCarty
3020 Moselle Rd
Union, MO 63084
636-629-2579
 
 
Have a great stitchin' time and enjoy the game today (if that is you thing)!


Wednesday, January 22, 2014

Magnetic Pin Dish

Which would you like setting next to your machine, the pretty dish or the cracked and boring plastic one?

These are so easy to make!  Here is all that you need!
 
The dishes are from Goodwill but I have a couple of Polish Pottery dishes that I am going to convert!  I used this heavy duty  silicone but any good strong glue would do.   I bought the magnets at the hardware (the big round one) and the others from Hobby Lobby.  After I made these and realized I like them enough to take the plastic one apart.   I pried the plastic one apart and it actually has 2 rectangle 1" x 2" magnets in it.  I really like the magnets from the hardware much better than from the craft store.
The important thing about the magnets is to make sure they fit inside the rim on the bottom of the dish.  If they are thicker use enough so the dish will sit flat and not teeter.  Notice the square one has one magnet in each corner and one in the center.
 
Hope you enjoyed this quick craft.  My next project is going to be Modge Podge fabric to the magnetic steel dishes that I use on my long arm.  They were purchased at Harbor Freight and look like they belong in a mechanic's tool box.   They really need to be dressed up.
 
 
The dishes were not my original idea - but I can't remember where I saw them.  It was just something that stuck with me because I really liked it!


Monday, January 20, 2014

#2 Finished for 2014

Actually, I surprised myself with this one!   I finished it in a week.   But let us step back to the beginning!   I only made one of the blocks.  Entered it into our guild's BOM Lottery and I won!  Nine blocks ready to be sewn into a top!
It is really a table topper as it measures 52" x 52".  Perfect for my large table.  I used a
stripe type print for the sashings and another print mottled for the binding.  I had it quilted in a day and I did machine sew the binding, which I usually do by hand!  I love it!  By the way, my block is the one in the lower left hand corner!

Is anyone interested in a mystery quilt?  How about one using  2 1/2" squares!  Hope to get it up by the 1st of Feb.


Keep on Stitching in 2014!
Pat

Tuesday, January 14, 2014

First of Many - I hope!

First quilt of the New Year 2014!

Friday, January 10, 2014

2014 And Here We Go!

Okay. on my last post --- a year ago!  Yeah one year ago.  I showed a few of the blocks I was doing for the Western Wayne County Quilt Guild Block of the Month.  Well I did them for a full year - all but one month and I have to thank Sherry Jones for helping me out. 
Here is the top that I finished with all 12 blocks.  I will get it on the frame in a few weeks and then it will be truly finished!

Sherry has taken over the BOM for 2014.  I will be making a block for the guild and also one for my self.  Mine will be red and white.  I will post a picture of the blocks I make each month.  I will make 2 blocks every month and one extra - making 25!

To recap 2013 I will show a few of the quilts that I did finish last year!

This was a 2-4-1 that I call Sunshine!
 
This is the Antique Rose Quilt.  It was a block of the month from Mother Hen Quilts.  The blocks  are machine embroidered and she had you make changes in the original designs.  I really enjoyed making this quilt.  I finished it at our Sewing Chicks Retreat last Feb.  
 
I had 4 baby showers last year.  Here are 3 of the quilts I made.
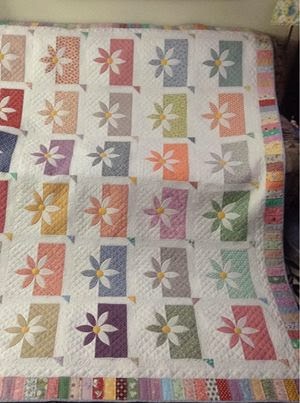
This was made from some 9 patches I had and I sashed them with pink and white for the new baby girl.


These 2 quilts are disappearing 4 patch. Both are made from charms of little boy things. The first one is for a friends little guy.    The second one was for my nephew's little guy.  Unfortunately Sawyer didn't make it but his parents wanted the quilt.
 
 
I also had a wedding last fall.  This was the quilt I made for the bride and groom. It is a large 4-patch poesy block.  I love the 4-patch poesy.   They were thrilled!


This quilt is just some fabric that I thought I would have some fun with.  Pinks, blacks, teals and whites.  Not my colors but I had fun with the design.


This quilt will give the quilt police nightmares.  I quilted through the embroidery!  It is a quilt that took years to finish.  I just didn't know what to do with the blocks - after I did get it put together I had no idea how to quilt it - so I just treated it as a regular top and quilted it as if it was all pieced.  I personally liked it and will do it again!


This is the last entry for the day.  I didn't make this quilt but I did quilt it.  My youngest daughter made this.  She followed the directions given in a magazine.  I didn't even know she was making it until she was almost done and decided she would like my opinion on the borders.  Very proud of her.  This was a wedding gift for a friend.


Well that is it for today.  I promise I will be back in a week or so with more pictures and projects.